I’ve done my share of dog nail trimming, so I realize that it makes many pet parents a little twitchy. Sure, the thought of inflicting possible pain tends to have that effect. But remember that successful trims really come down to a few basic guidelines involving 1) the comfort of the canine, and 2) the technique used by the trimmer (i.e., you). Nail trimming isn’t something we can ignore entirely because overly long nails can actually affect pup posture and joints. But if you’ve been on the fence about how to trim dog nails safely at home, let’s start with a quick anatomical overview.
First, let’s talk about the anatomy of dog nails
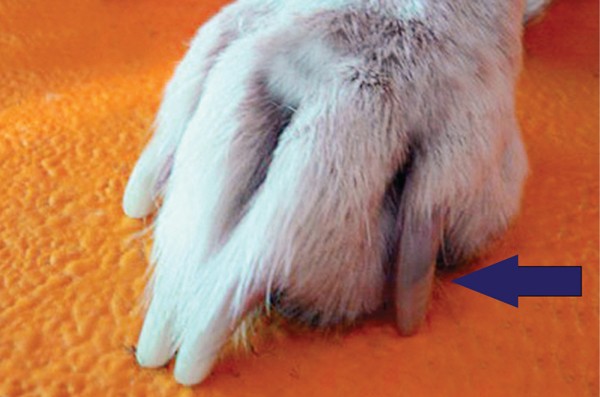
The quick, a pinkish-colored area near the nail base, is much easier to visualize on lighter-colored dogs with whitish nails. Photography by Marybeth Bittel.
The canine nail is kind of like a Klondike bar, meaning it’s composed of layers. The sturdy outer “shell” is the part we actually see. Inside this protective coating is a soft inner layer known as the quick. This layer — which contains blood vessels and nerves — begins at the base of the nail, and ends near the curve. Cutting the quick is a big “ouch” for your pup and often causes yelping/bleeding/general dismay. So it’s important that you can picture precisely where that inner layer is situated.
If you have a dog with light-colored nails, the quick is easy to see. It looks like a pinkish-colored segment near the nail base. Dark or black nails usually conceal this; so if necessary, borrow a white Poodle to get a feel for general positioning. Once you’ve located the quick, never trim closer than 2 to 3 millimeters away.
Dog nail trimming tools
Before talking about how to trim dog nails, let’s look into at-home trimming tools. Some people prefer clippers; others like grinders. Simply select the option that makes you and your pup feel most at ease.
I’ve noticed that grinders provide some added control and smoothness — a Dremel is one example — but certain dogs are spooked by the buzzing noise. Clippers are available in two varieties: scissor and guillotine. The first is self-explanatory, with Safari and Miller’s Forge representing two solid options. Guillotine clippers are designed with a hole that the dog’s nail pokes through. Squeeze the handle, and a blade snicks up to cut the nail. The easy-to-use Zen Clipper, which we reviewed recently on Dogster, falls into this category, too.
Preparing to trim your dog’s nails
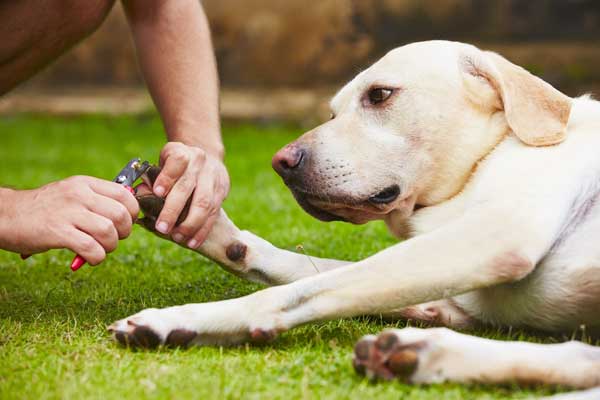
Prepare appropriately before trimming your dog’s nails. Photography by Jaromir Chalabala / Shutterstock.
Initially, experiment a bit to decide which dog nail trimming tool you prefer. I like to do a few practice cuts on a toothpick or skinny chopstick. Then put aside that tool, and get your pooch accustomed to having his paws held. Some dogs, like our Maizy, abhor any type of foot contact and will yank their leg away. So simply hold each paw in your hand daily, touching the nails for a few seconds. The moment you release, reward with tons of praise and a tiny treat.
After doing this for several weeks, place your chosen trimming tool on the floor with a few tasty treats on top. Let your pooch sniff the tool and take the treats, while you praise enthusiastically. Using a grinder? Switch it on for a couple moments and give your dog a treat. Perform these exercises for a minimum of two to three weeks — or until your canine seems completely at ease.
Once you’re ready to try an actual trim, choose some favorite low-cal training treats to keep nearby. Also have a small jar of styptic powder and some cotton balls on hand. This is only a precaution because cutting the quick is unlikely if you’re careful. But know that patting styptic powder around the nail base stops any bleeding. Now go back and read those last couple sentences again. Okay? Deep breath — you got this!
Find a comfy spot with nice, bright lighting. Get your dog in a relaxed position — standing or reclining on the floor. For each individual nail:
How to trim dog nails: clipper method
- Hold the tool in your dominant hand.
- Hold your pup’s paw firmly in your other hand — thumb on the foot pad, fingers atop the foot, near the nail bed.
- Begin at the very tip — especially if your dog has dark nails.
- Only trim about 1 to 2 mm at a time, gradually moving toward the quick.
- Examine the cross-section of your dog’s nail each time you cut. When you start seeing a tan-colored oval, you’re nearing the quick … so stop cutting.
- Use a nail file to smooth rough edges.
How to trim dog nails: grinder method
- As with the clippers, hold the tool in your dominant hand; dog’s paw firmly in your other hand.
- Gently touch the grinder to the tip of your dog’s nail and silently count to two.
- Remove the grinder for a few seconds; praise your pup; repeat.
- Continue until you begin seeing that tan-colored oval … then stop.
Some final tips on how to trim dog nails
Be extremely patient, go slowly, and offer tons of praise and/or training treats. Never trim when you’re rushed. Likewise, if you start seeing canine stress signals like yawning, take a calming break. No rule says you need to do all four paws at once. So after you’ve rewarded your pup, reward yourself. Klondike bar, anyone?
Tell us: What are your tips for how to trim dog nails?
Thumbnail: Photography by Remains/Thinkstock.
April is Spring Cleaning month here at Dogster! Stay tuned for a few articles every week on all things spring cleaning and dog — whether that’s dog-safe ways to clean your home, spring-cleaning your dog’s grooming routine with advice on brushing and bathing — and much more.
Read more about dog grooming on Dogster.com:
- Wondering How Often to Bathe a Dog? It Depends on These Factors
- Easy Ways to Deal With Matted Dog Hair
- Wondering How to Clean Your Dog’s Ears? A How-To (and How Often!) Guide
The post How to Trim Dog Nails — Safely appeared first on Dogster.
No comments:
Post a Comment